Life's rich patisserie
This week at Bread of Heron, the Heron Corn Mill's community bread group, we were baking a rye loaf and an apricot couronne. Both recipes had their challenges.
All-rye bread
Rye flour has little or no gluten. If you try making a loaf with 100% rye flour and nothing else, you risk getting a 100% brick. It is possible to get a sourdough all-rye loaf to rise to a reasonable level, but it takes a very long time and is likely to be very sour by the time it is ready to go in the oven.
The basic all-rye loaf is a Russian black bread. This sometimes comes with seeds like coriander added for crunch and tang, not that tang is in short supply. The classic Borodinsky all-rye loaf has coriander seeds and fruit.
Rye flour soaks up much more water than other flour, which just adds to the heaviness and density of a 100% rye loaf. Because it is really heavy, the top is likely to be completely flat like this -

If you see a rye loaf with a dome shape like this -
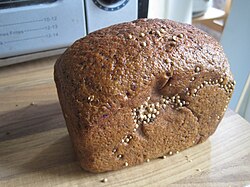
then you can be sure there is something else as well as rye flour in the mix. That's not necessarily a bad thing, but if you want the real McCoy, you should go for a flat topped loaf.
Here are two nuggets of wisdom, learned through bitter experience. If you learn from my mistakes, you could save yourself a lot of trouble!
- Before buying a tandem, hire one.
- Before baking an all-rye loaf, buy one.
Making a rye smile
Rye needs a bit of help getting up in the morning. The usual thing is to cut the rye flour with something else. Depending on what effect you want, you might choose to replace anything from 25% to 75% of the rye flour with strong white flour.
Mixing 25% rye flour and 75% strong white gives a slightly grey loaf with a light texture and a noticeable rye flavour. This is a common approach in Germany.
Mixing 25% strong white flour and 75% rye gives you a good chance of getting the loaf to rise without losing the dark colour and deep flavour of rye. This is what we did in the shepherd's hut. But by adding a sweet element in the shape of treacle, molasses or malted barley, we made something closer to a tea-loaf.
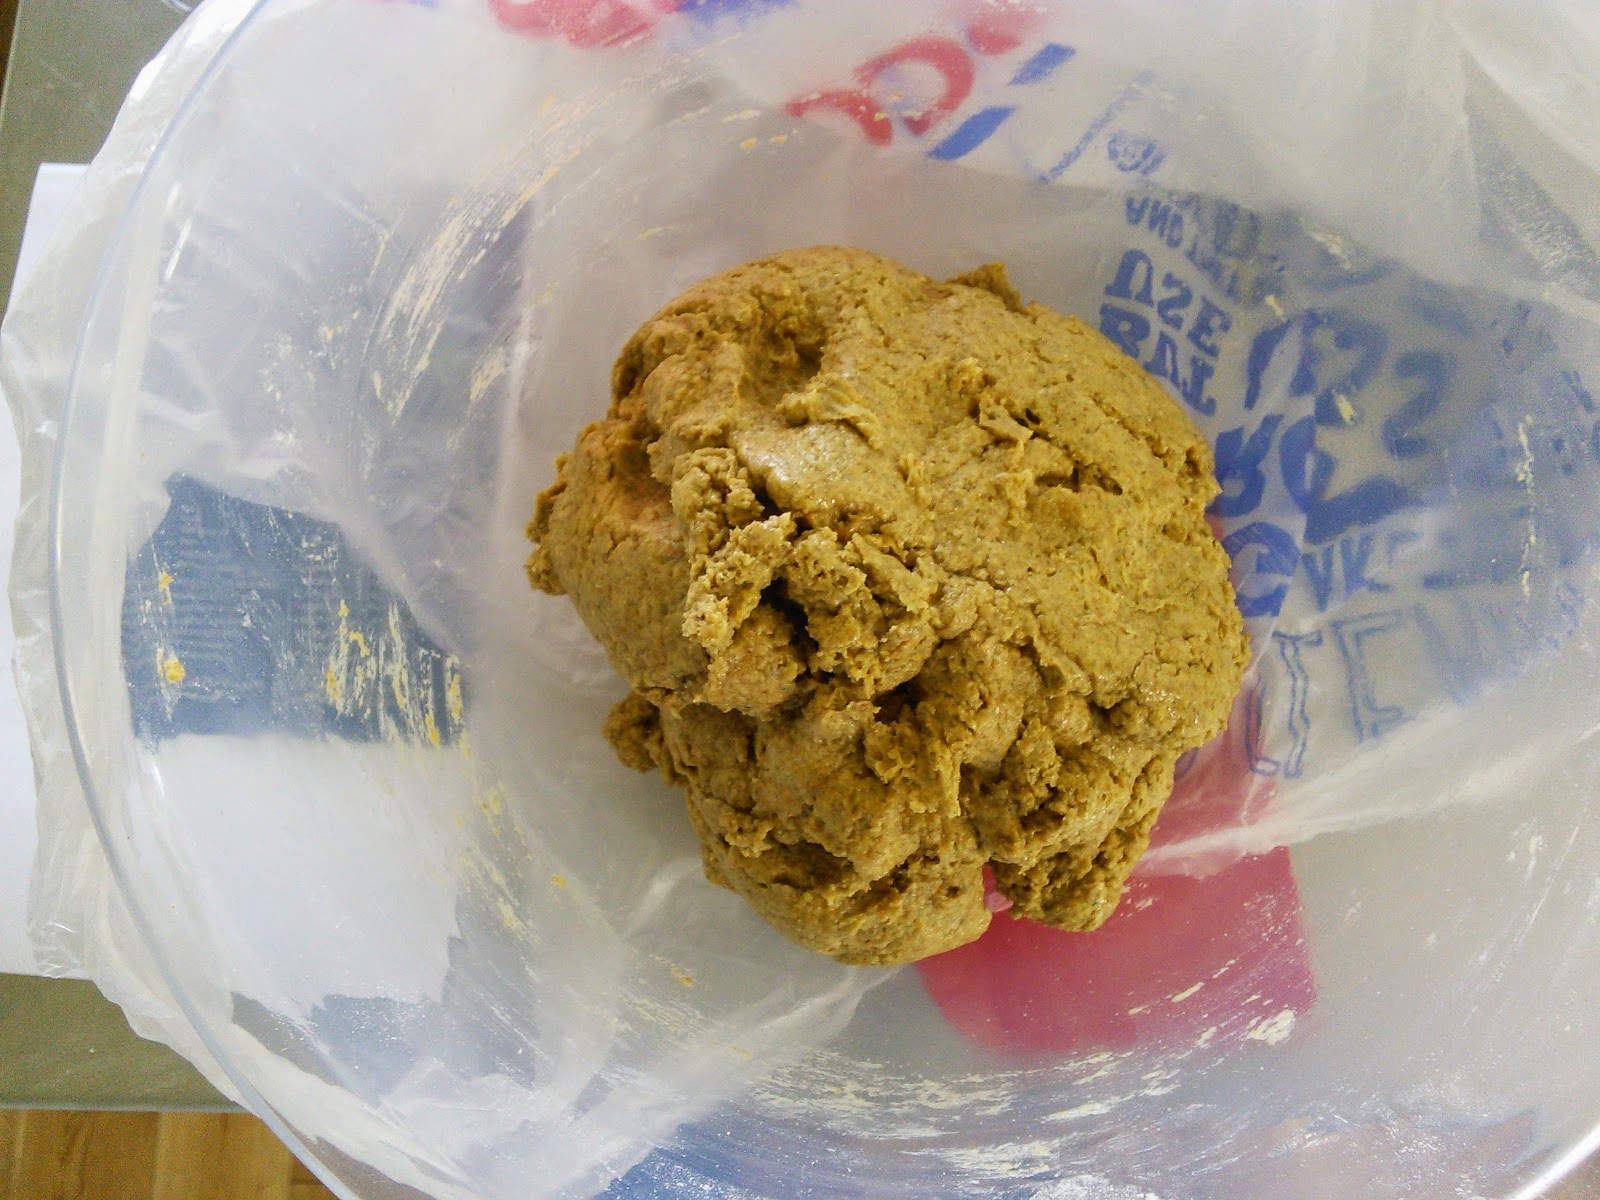
Unlike loaves made with more glutinous flour, the first rise (such as it is) doesn't involve a vigorous kneading: there's no point. You just bring it together into a rough ball and let it get started. After resting for an hour, there was just a little gas in the dough. This was my rye loaf taking an hour out before being kneaded.

I think this interesting effect is a combination of a fairly hot oven - the shepherd's hut oven generally seems to cook a little quicker than the recipe says - and a heavy duty Heron bread tin. Here's one coming out now -


I managed to make mine stick to the tin, but I still loved the little fellow, and the flavour is heavenly. This is certainly a recipe I'll be doing again.
At this point the train separated. The front carriages took the couronne branch, while Nell and I shunted off into the sidings to prepare some bread for the upcoming National Mills Weekend.
Apricot couronne
Having taken a deep breath, you make the dough into a rectangle and spread the filling along the middle. Then roll it up into a long tube and cut it in half lengthwise, letting the two halves lie next to each other. This means the filling is exposed. Then you get hold of one end of both pieces in one hand, and the other end of both pieces in the other hand. Finally twist clockwise with one hand and anticlockwise with the other hand, as if you were wringing out a wet towel. You now have something like a long piece of barley sugar, twisted all along the length. Bring the two ends together and join them into a ring. And relax.
Everybody got a really good looking celebration loaf to take home, as these pictures show.


Grandma Gabe's caraway seed bread

This recipe came from my mother in law way back in 1982. As it recently turned up in a box in the attic, I decided to try it out again for the National Mills Weekend at Heron Corn Mill.
It's a very wet dough, so Grandma Gabe used to squelch it around in a washing up bowl rather than kneading it in the usual sense.
The other strong characteristic of this bread is the flavour of caraway seed. It is a marmite among bread additions - you either love it or you hate it. I love it, but my wife has only recently acquired the taste, and it hasn't been made at home for over thirty years. If my luck holds, and we are genuninely entering a new age of caraway tolerance, I hope to be making this once in a while for ever, as it is really gorgeous.
By my calculations in clocks in at 77% hydration, so it is definitely "on message" in terms of wetterness is betterness.
Here from the Taylor archives is the original card index - the official medium for hand-me-down family recipes. It has that extra edge of authenticity, don't you think?


Roughly translated, the recipe reads like this -
BROWN BREAD
4 tins well greased with 1.5 oz (42 g) melted butter
Ingredients
3 lb (1,362 g) brown wholemeal flour
2 flat tablespoons (30 g) dried yeast
1 flat tablespoon (15 g) salt
2 pints (1,120 ml / g) blood heat water (0.5 pint boiling water, 1.5 pints cold water)
1 flat tablespoon (15 g) caraway seeds
2 flat tablespoons (30 g) linseed
1.5 oz (42 g) melted butter for greasing 4 tins
Method
Put powdered yeast into basin with brown sugar mixed with wooden spoon
Add 0.25 pint blood heat water to the above (keep rest of water covered up)
Put this mixture covered up to warm place to "sponge" (e.g. very very low oven)
Grease tins
Weigh out exactly 3 lb flour (1,362 g) into washing up bowl and add a tablespoon (flat) of salt, and other ingredients to flour
Add the above to "sponged" yeast with the wooden spoon
Knead for 15 mins with radio
Divide into 4 sections and put into tins covered with tea towels or paper towels
Leave in a warm place for 1 hour
When bread nearly up to top of tin, BAKE at gas mark 6 for 40-45 mins, preheat oven for 10 mins
There are several vintage touches that I love here.
"Knead for 15 mins with radio"
I feel your pain! What better to take your mind off the agony of kneading 2.5 kg of wet dough than listening to the BBC Home Service, or perhaps Test Match Special?
And the obsession with the wooden spoon! What's that all about?
Whatever you do, don't forget to grease those tins!
Isn't it great to do the kneading in a washing up bowl? I actually turned this out onto the work top, and had a fine time kneading it with stretching movements, rather than pushing movements. This video shows you a very clever stretching method of kneading, demonstrated by the rather brilliant M. Bertinet. He is working with a 70% hydration dough, and mine was 77%, so you can imagine my dough was considerably wetter than his!
This bread is special, so there is no excuse for cutting any corners at all. First off, get the best flour you can get - Heron Corn Mill wholemeal wheat for example -

Then don't stint on the kneading. With so much water it will seem like a bit of a nightmare at first, but a good kneading and the generous amount of yeast the recipe calls for will ensure that the bread rises well.

The bread has so much water in that it won't have the strength to create a domed top: you should only expect to see a flat top, but it will get towards the top of the tin.

The real joy of this bread is the flavour. The dough is rich and nutty, and the caraway adds a hefty dollop of tangy flavour on top. A real desert island loaf! Now where's that marmalade?

Notes from Palestine
This week our special correspondent Bouran introduces us to the first of two traditional kinds of oven used to make flat breads.
Taboun
There are two types of bread in Palestine: first the peasant type of bread which is called Taboun / Tabon where special ovens made of mud and straw are set up and then wrapped up with a layer of wood fire ashes. It resembles the shape of a shallow well the surface of which is covered with pebbles that are heated so they would form the base heat for baking and crisping up the bread. This bread is usually made of wet yeasted dough, then flattened and thrown into these special ovens for a few minutes. The pebbles will give this kind of bread its distinctive shape.This is what Taboun bread looks like -This is a Taboun oven from outside -Taboun oven from inside -
Another type of Taboun oven from inside -


Compare Baroun's second type of taboun (which looks like a more modern version to me) with this Indian tandoor -
Back to Bouran for more details about the Taboun -

Heat source
The heat for the Taboun comes from the outside. I did ask dad more about how this outside heat works out for the Taboun, and he said once the Taboun structure is built, a process which may take weeks as Taboun need to dry along the way of building up, a hole is usually dug into the ground, then the Taboun is tucked in there leaving its opening above the ground. Then basalt type of small stones are used to cover the base of it. A special metal lid with a handle is usually made to seal off the Taboun. Once that is completed, the whole structure will be covered with the materials used to set up the fire and therefore heat up the Taboun. Interestingly, and unlike Tandour, or Tanour as we call it in the Middle East, the flaming materials used in slowly and gradually heating up the Taboun are traditionally hay combined with the remains of olives pits that come out of pressing olives in the process of making olive oil. Those remaining hard pits were taken and left to dry out in the sun before being used in heating up Taboun. Those farmers were amazingly very smart in their conception of recycling and going green.But why dried olive pits in particular? As I understand it, these helped preserve the heat surrounding Taboun walls over longer periods. A newly built Taboun had to go through a warming up stage for at least 2 days prior to its first use for baking. Then it had to be preheated twice a day: once at night and therefore would be ready for baking in the following morning, and another time in the afternoon when another batch of baking/ cooking needed to be done in the evening. Yes, Taboun was not only used for baking, but also (as Sue said about her grandfather the baker) Palestinians used it for roasting meat, vegetables, nuts, coffee beans etc.
This warming up stage will all sound familiar to anyone who has used a Baxi or Rayburn oven. Stoke it up at night to burn slowly, and then give it a good raking through in the morning and some fresh fuel to get it going again. Not unlike refreshing a sourdough, in fact.
And the tabour is not alone in needing two days to get up to baking heat. This brick built oven, which has a large room to itself in Lanhydrock country house also needed two days to get hot, and needed to be kept going the whole time, like a steel works.
The traditional way of timing the bread in ancient ovens was to seal the door with a line of dough. When the bread on the outside of the oven was done, the bread on the inside was done too.

Hedgehogs
Building the taboun oven under ground and covering it with the fire sounds very much like the gypsy method of baking hedgehogs wrapped in clay and covered with hot ashes. By the looks on these faces, hedgehog must be a tasty dish!
While we are on the subject of hedgehogs, there is a nice little company called Hodmedod's Great British Peas and Beans. Hodmedod is an old East Anglian word. In Suffolk it means a snail, but in Norfolk it means a hedgehog. The two meanings share the idea of something that rolls up.

Hodmedod's main product is fava beans, which I think would be familiar to Bouran. They are known here as broad beans. They date right back to several thousand B.C. and they are good for the soil as well as the digestive system.

What to do when you have made too much bread
I was hoping to show you a picture of some really good looking sourdough I saw in Fortnum and Mason's last week. It's free to look, and not too expensive really at £3.95 a loaf. But unfortunately there doesn't seem to be a picture anywhere that I can mercilessly rip off. So I hereby offer you instead Jane Austen's mum's recipe in verse for bread and butter pudding.
I think we should share ideas about what to do with left over bread. There are plenty of Italian salads and soups designed to use up ends of bread. Maybe we could start with a few of those. But the time has come for you guys out there to cough up some suggestions.
And when do we consider that bread needs using up anyway? I reckon my bread stays fresh for a good week. So I am not at all shocked to read that Molly Bloom - a girl after my own heart! - liked her bread a day old (Ulysses chapter 4).
"Boland's breadvan delivering with trays our daily but she prefers yesterday's loaves turnovers crisp crowns hot."

Hope you enjoyed National Mills Weekend this week!
No comments:
Post a Comment