Saturday, 5 November 2016

Sourdough Saturday

This month we're having a Sourdough Saturday at the Heron Corn Mill. Sourdough is something that keeps coming up in conversation, and lots of people are curious to see if it really is so much of a black art. So I have risen to the challenge, and will be helping people have a go at my very simple way of making sourdough. Hopefully we will avoid enough of the pitfalls to come away with some proper sourdough, and the results will make people feel like it is worth the effort. Otherwise I'm in big trouble!


The idea is to try and do the whole end to end process within a day. More accurately, we'll be doing it within 24 hours. End to end sourdough just doesn't fit into a single calendar day because the rising time needs to be really long - 16 hours is pretty well a minimum. Fortunately it actually works best if you do the really slow part (which requires minimal human intervention) overnight, and the less slow part (where all the baker's work comes in) the next day. This is the approach we, like all sourdough bakers, will be taking. It's called prefermentation, or making a sponge.

What is a sponge?


Let's make a sponge. What does that even mean? And what does it involve?

A sponge is basically a very wet dough that is allowed to ferment very slowly for a very long time. To make it ferment, it needs some yeast, but to ferment for a very long time it needs to be a very slow acting yeast.

Commercial yeast is factory produced (even the fresh variety) and is specifically designed to act very vigorously, so that it can raise dough very quickly. It's all about producing gas. This is absolutely not what sourdough is all about: it's about producing flavour and texture.

The yeast that a sourdough sponge uses is natural wild yeast, designed by nature to act slowly by breaking down the complex "stuff" in good flour into less complex "stuff" plus various good gut-friendly acids, and a bit of gas. You can see I am not very scientific about this. I don't feel it is important to understand the details, but it is very important to recognise the good effects that result from this process.

Why is sponging a good thing?


The good effects that a long slow fermentation produces are -
  • really good flavour
  • much more strength and sponginess in the body of the bread
  • generally open texture
  • crunchy crusts on day 1
  • more digestible bread and a happier gut


How to describe a recipe


If you are making a batch of dough for a couple of loaves, the recipe might call for 700 g of water and 1 kg of flour. The ratio of water to flour in the final dough is 700 : 1000 so the hydration level is 70% - quite a soft dough. You can work this out very simply on a calculator. Just divide the weight of water by the weight of flour, and multiply the result by 100 to get the hydration percentage.


The recipe uses 1700 g for 2 loaves, but after it's been in the oven, the bread will probably only weigh 1600 g. So you could describe the recipe as "2 800 g loaves at 70% hydration".

How to describe a sponge

The sponge is typically made up with half the total water that the recipe calls for, and a quarter of the total flour. It is often called a quarter sponge. You include some sourdough starter culture in the sponge, but you don't add any salt at all.

The sponge for the recipe above would be made up with half the water (350 g of water) and a quarter of the flour (250 g of flour). The ratio of water to flour is 350 : 250 so the hydration level can be worked out like this -


The sponge's hydration level is 140% - twice as wet as the recipe calls for in the final bread. Keeping the starter culture at 140% hydration means it is at the same hydration level as the sponge. This is well worth doing, in my experience, because it simplifies matters a lot.

Making a sponge at 140% hydration gives the wild yeast ideal conditions -

  • plenty of fresh food in the form of wholemeal flour (organic so it is pesticide free)
  • plenty of water
  • no salt
  • reasonably warm conditions (at least compared to the fridge!)
Making a dough using a quarter sponge simply involves adding the other half of the water, the other 3 quarters of the flour, and the salt.

Yeast for use in a sponge


So where do we get this wild yeast? The answer is of course that it's everywhere - in the air, on the grain (especially rye), and on the skins of fruits, provided the farmer hasn't dosed it with pesticides.

If you have ever cycled through a vineyard at harvest time, when the grapes are practically drunk with their own juice starting to ferment in their skins, you will know what I am talking about.


And the smell from apples being crushed for cider is the same thing - just more British.


For sourdough, we need to have access to this yeast in a readily available form. That is why bakers around the world keep a sourdough culture (sometimes called a starter, or a mother) in the fridge. Quite literally, you make a sponge, and bottle it. The yeast in the sponge that you bottle and keep in the fridge as your starter will go to sleep when it has done its work on the available flour. It can happily stay in suspended animation, like a genie in a bottle, until it is needed again, which is next time you want to bake.

San Francisco sourdough culture under the microscope
So all you really need to be a sourdough baker is a bottle or plastic jar in the fridge to keep your yeast genie in. You can spend as much or as little as you like on equipment, but you can't economise on time or commitment, or it just won't work.


Getting started with a sourdough culture


Because the grains that flour is made from are covered in wild yeast, wholemeal flour by definition also contains wild yeast. So to make a new sourdough culture from scratch, you need some wholemeal flour (organic so you know there is no pesticide in the flour) and water. Nothing else.


Just out of interest, I thought I'd prepare a rye culture ahead of Sourdough Saturday at the Heron Corn Mill. Here are my pictures showing what it looked like at various stages of its development.

Day 1 Monday 31st October 2016


First zero the scale with an empty glass jar, so we are weighing just the ingredients. I do this each day as the first step so I am always recording just the weight of the ingredients, and not the jar, each day. [Make sure you can recognise the jar next time you need to use it to zero the scales: empty glass jars tend to look similar!]


Next add my standard feeding quantity - 50 g of flour - to the jar.


Next add 70 g of water, making 120 g of starter.


Calculating and recalculating the hydration percentage


The important thing to realise about sourdough is that you need to know what has gone into it. And this is at least as important when you are making a starter and a sponge. It's not the total amount that's important, it's the amount of water, the amount of flour and most of all the ratio of water to flour, in terms of weight.

My starter has 70 g of water and 50 g of flour. The ratio of water to flour is 70 : 50. Use the calculator to check what that is as a hydration percentage. 70 divided by 50 multiplied by 100. The hydration level is  140%.

Normally, 140% hydration is a really wet batter-like consistency. This time however, it gave me quite a stiff mixture, because the rye flour soaks up a tremendous amount of water.


So I added another 70 g of water to loosen the mix.

[Note: I unwittingly made a rod for my own back here. From this point onwards I need to be extra careful to keep track of how much water and how much flour I put in, so I can be sure what the ratio of water to flour is. You can avoid this complication if you like by deciding once and for all that every time you add so much flour you will add so much water, and sticking to it. By day 5 I am beginning to wish I had! Still, it's all good practice at working out the hydration level.]


I've now got 140 g of water and 50 g of flour, so the ratio of water to flour in the starter at this stage is 140 : 50 which is 280% hydration. It doesn't matter what the actual figure is at this stage, because it can be adjusted later. The key thing is to get a nice wet mix so the yeast can get to work in ideal conditions. And you need to write down exactly what has gone in - you won't remember. 

I then loosely put the top on the jar and left it in the kitchen overnight to get started.


Day 2 Tuesday


Next day I inspected the starter, but there wasn't much going on yet.


There are a very few bubbles, but really, nothing you could get excited about. Nothing daunted, I carried on with a second lot of 50 g of flour.


And another 70 g of water.


So now I have 210 g of water and 100 g of flour. The ratio of water to flour is 210 : 100, which is 210% hydration.

I left the starter in the kitchen again with the top loosely on overnight. Next morning there were still just a few bubbles.


Day 3 Wednesday


At this stage I thought maybe it was time to give the starter a bit of a kick, so I transferred it to the warmest place in the house - over the poorly insulated hot water tank in the airing cupboard. In the evening I fed it with another 50 g of flour and 140 g of water, to keep the mix nice and wet.


So now I have 350 g water and 150 g of flour. The ratio of water to flour is 350 : 150 and so my hydration level is 233%. Hopefully something will happen soon.

At last! Some action!


By the end of day 3 I am starting to see some bubbles. The smell is still quite sweet and pleasant, so I'm happy to let it keep doing what it is doing and not interfere while it is going well.


Day 4 Thursday


By lunchtime on day 4 my weekly bake is complete. My magnificent wholemeal recipe has delivered again, in spades, and my sourdough has survived sticking to the peel.

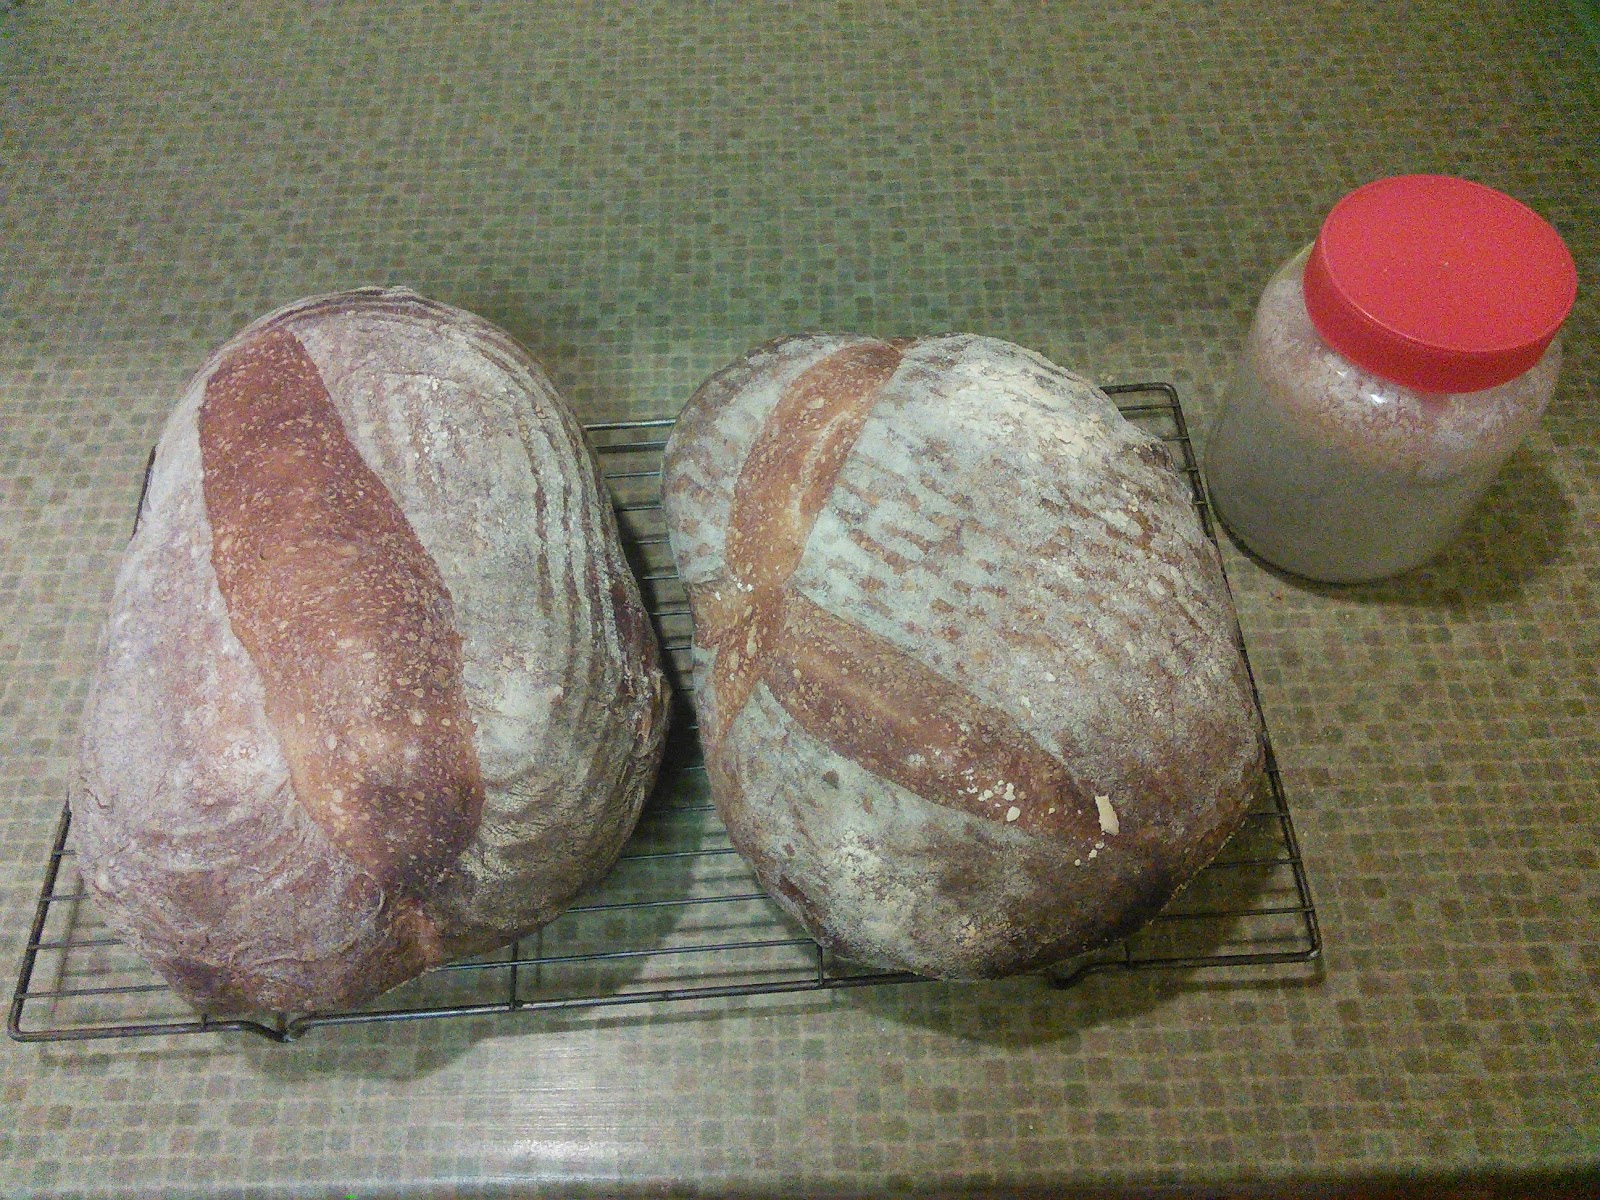

More to the point, my starter is clearly on the road. It smells nice and fruity at the moment, though I don't expect that to last. The bubbles are forming a fairly distinct layer of thick froth at the top of the jar, so I am going to start giving it a stir now and then.


By teatime today the starter has developed a thick almost crusty top layer, and a fine malty smell. The taste is not so nice - a mixture between stewed plums and something medicinal. It seems like war has finally broken out in the jar, and I think it is now time to start cutting the mix back. This simply means that before my next few feeds I will throw half the mixture away. It sounds wasteful, but over time one strain of yeast will become stronger, and will overpower the others. Cutting back and feeding will encourage the strongest strain to keep growing more and more dominant. It's just accelerating the process of natural selection, really. It also means I don't need a bucket to hold the culture - a jar is big enough.

Once one strain of yeast takes control of my culture, it will start to become less volatile, and it will be worth risking using it to bake with. And it is a risk, believe me!

By the end of the evening the starter has developed quite a pungent bouquet, and is decidedly sharp to the taste.


Time to act!


The first thing to do is check that the jar contains what I think it contains. Reading back through my notes from last night, I think I have 350 g of water and 150 g of flour, at a hydration level of 233%.


OK, the starter now weighs in at 496 g so I have lost 4 g to evaporation, but basically I am right. Now let's harden our hearts and throw 50% away.


That's dealt with my evaporation, anyway! Now I haven't changed the ratio of water to flour - I've just thrown some away. I now have 175 g of water and 75 g of flour. My starter is still at 233% hydration. It is important to do these calculations again, so that I know what I have got in my jar at all times. Remember, you need to keep a track of 3 things -

  • the amount of water
  • the amount of flour
  • the ratio of water to flour

And throwing away half the culture only involved wasting 75 g of flour, which at £3 for 1.5 kg is 15p - hardly breaking the piggy bank. Now I can feed the starter with my usual 50 g of fresh flour.


And another 70 g of water.


By the way, if your water is chorinated, Vanessa Kimble (Bakery Bits sourdough correspondent) suggests leaving it to stand for a few hours before using it in your starter. I've never thought chlorine was a problem with our lovely lake district water, but it's worth thinking about anyway.

Finally, recalculate what is in the jar. I had 175 g of water and added 70 g so I have 245 g of water. I had 75 g of flour and added 50 g so I have 125 g of flour. So the ratio of water to flour is 245 : 125. Work out the hydration percentage on the calulator by dividing the weight of the water by the weight of the flour and multiplying the result by 100 -


So I am taking forward to day 5 a starter with 245 g of water and 125 g of flour, at a hydration level of 196%.


Day 5 Friday


This evening my starter has a robust crusty looking top layer and a fairly pleasant smell somewhere between beer and pear drops. The pear drops however suggest that things could still turn nasty, so I am keeping a close watch.

The first surprise is that the jar which yesterday weighed in at 370 g, today weighs in at 380 g. I have no idea what has happened there! Something to puzzle over with a bit of unpasteurised camembert "avec son verre de vin rouge" and some of yesterday's wonderful bread.


Much later I realised that I had 2 apparently identical empty jars in the cupboard, either of which I might have been using to zero the scales.


One jar weighs 14 g more than the other. So the apparent increase in the weight of my starter was caused by zeroing the scales with a lighter jar. Simples. Far from increasing by 10 g, the weight had in fact gone down by another 4 g due to evaporation. So in the following pictures, I need to reduce the weight shown by 14 g.


 OK - throw half away.


I now have 176 g of starter (14 g less than shown on the scales) at 196% hydration. That is 117 g of water and 59 g of flour. Now add 50 g of flour.


And 70 g of water.


Finally recalculate the hydration. I now have 296 g of starter (14 g less than the weight shown on the scales). That is made up of 187 g of water and 109 g of flour. The ratio of water to flour is 187 : 109 so the hydration level is 172% (187 / 109 * 100 = 172 to the nearest whole number).

The sponge is getting close to my preferred final hydration level of 140%, but it is also getting a bit thicker than I would like, so if I don't like the look of it tomorrow, I will add some more water to slacken it again. I can always adjust it on the momentous day I finally bake with it.

The first sponge - entering maintenance mode


I think you have got the idea now of how to make a starter from scratch. There are only so many photos of a jar of flour and water that you can stand.

Assuming you have persisted with the cutting back and feeding until the culture has become less volatile, you will eventually feel it is time to let the beast loose, and see what happens when you bake with it.


This is a big day for your starter, because it marks the point where it begins the rest of its life. From now on it will generally live a life of seclusion, in the fridge, contemplating what might have been.


And occasionally, life will brighten up, food will be plentiful for a while, and then just as suddenly, it will find itself back in the fridge, feeling refreshed, but ready once more for an indefinite sleep.


You will have to learn a new routine as well. Two days before you want to bake, you need to get the starter out of the fridge and feed it, keeping the ratio of water to flour the same. So if your starter in the fridge consisted of 70 g of water and 50 g of flour, or 120 g of starter at 140% hydration, feed it another 70 g of water and 50 g of flour, making 140 g of water and 100 g of flour, or 240 g of starter at 140% hydration.

Then the day before you want to bake, turn the whole starter out into a mixing bowl, and feed it again. That will give you 210 g of water and 150 g of flour in the mixing bowl. Feed it again, if possible, during the day. That will give you 280 g of water and 200 g of flour in the mixing bowl, or 480 g of starter at 140% hydration.


And in the evening top it up so that you have the right amount for a quarter sponge plus the original 120 g of starter you took out of the fridge. That means you can take a fresh 120 g back and put it in a clean jar in the fridge to be your refreshed starter for next time you want to bake.

If your recipe asks for 700 g of water and 1 kg of flour, your quarter sponge would consist of 350 g of water and 250 g of flour. So you need to top up your mixing bowl so it contains 420 g of water (350 g for the sponge and 70 g for next time's starter) and 300 g of flour (250 g for the sponge and 50 g for next time's starter). The ratio of water to flour in your mixing bowl will be 420 : 300 or 140% hydration. So not only will your sponge be at 140% hydration (twice the hydration for the finished bread) but the 120 g you take back for next time's starter will also be at 140% hydration.


Your brain will be hurting


Too much arithmetic already! But it really is worth thinking through all the steps and checking your figures at every stage. Eventually it will become second nature, so long as you stick with it.

Fortunately, it's not just you that needs a bit of quiet time after all that arithmetic. The sponge needs to be left alone overnight, with just a tea towel over the mixing bowl, so it can get on with the really slow job of breaking down all that new food you just gave it, and making a lovely wet, gloopy, tangy, sour dough for you to use next day in your baking.

You can go to bed secure in the knowledge that your starter is back in the fridge, refreshed and ready for next time. And your sponge will be ready to go when you are ready to make your lovely sourdough bread next day.

Just one thing, and this is very very important: don't forget to take back the 120 g starter and put it in the fridge. I have done this on a number of occasions, and my best advice is to have a written routine, and include a written reminder to check you have done it. You WILL curse when you forget!

Making sourdough bread using a quarter sourdough sponge


Wel,, that's another story...

Tuesday, 17 November 2015

Sourdough, sodabread and sums

First of all, let's celebrate the fact that even mighty Google has sat up and taken notice of our bread making activities in Beetham! This morning I received a couple of creations that Google had made from my photos, featuring my 60th birthday bash and recent bread making sessions of both Bread of Heron groups. There is no escape from the all-seeing gaze of Big Brother - they even included the bread that was forgotten about and left in the oven!

This week in Bread of Heron, the Heron Corn Mill's community bread group, we tried our most ambitious bake yet - sourdough. And I discovered how flustered mental arithmetic can make me.

There is no getting away from the fact that there is something special about sourdough, but equally there is some special complexity about making it. It really needs lots of time, and it is temperamental. You need to take account of what it looks and feels like, and how it is behaving. If you don't get in tune with the dough, you will not get a happy loaf out of it. I know this sounds a bit like looking after a Tamagotchi, but seriously, you need to get on your sourdough's wave length.


Following Julius Caesar's example in the Gallic Wars, we split our problem into three parts -


  - sponge production
  - dough production
  - shaping and baking


Pars prima - sponge


Four adventurous bakers have their own sourdough cultures at home in their fridges, and they started their own sponges off at home from their cultures on Wednesday.

I went into mass sponge production from my culture on Wednesday so that anyone who didn't have their own culture could have some of my common stock sponge when we met for our extra session at the shepherd's hut on Thursday. In effect these bakers joined the action at the second stage.

Pars secunda - dough


On Thursday we met at the shepherd's hut to make up our dough using the sponge that we had started the day before. The dough was then covered up and left in the hut overnight.


There's always one


One baker brought a very unusual ingredient along - grated beetroot! This was extremely interesting, not least because it introduced an extra unknown into the equation: how much water is there in a beetroot? Time would tell.


There was something quite exciting about leaving the dough to its own devices for so long, and just walking away. A bit like putting the kids to bed in a tent in the back garden.

Pars tertia - shape and bake


Our regular Friday morning session then started with inspecting our dough to see how it had fared overnight. There were some satisfying gasps when we found that all the dough had risen strongly and was ready for shaping and proving in baskets. There had always been the chance that we would have nothing to bake if anything had gone wrong overnight.


Our extra meeting - Pete nearly flips


Thursday sounded like a nice easy day - just take the sponge and make some dough with it. What could possibly go wrong with that? Well, you only find out that you have been making assumptions when somebody challenges them.

I had made my sponge by eye - that is, I knew what kind of consistency I wanted, and I just aimed at that. I fed and re-fed the sponge over 24 hours, and so long as I finished up with the right kind of gooiness, I was happy.


Arithmetic alert


The next two sections (Error primus and Error secundus) are full of the kind of arithmetic that is vital if you want to estimate your hydration level accurately.

Readers of a nervous or sleepy disposition may wish to skip forward to the section called The normal Friday baking session.

Error primus


Unfortunately, at some stage I had decided that my sponge was basically half flour, half water, and that idea had got lodged in my head. So when I shared my sponge with the other bakers, I said they should think of it as half flour, half water, and adjust the other ingredients in the recipe accordingly.

That was my first mistake, because if my sponge was, as I intended, a quarter sponge - a quarter of the flour and a half of the water - then it would actually be 58% water and 42% flour.

Total weights for a loaf:

500 g flour
350 g water

Weights for a quarter sponge:

125 g flour
175 g water

Total weight of sponge:

300 g

Percentage of water in sponge:

175 / 300 = 58%

Error secundus


My second mistake was to get mixed up between the amount of culture that is put into the sponge (100 g), and the amount of sponge that is put into the dough (300 g). I told everyone to put 100 g of sponge into their mixing bowls, and then add the rest of the flour. Because of my first error I said there was 50 g of flour in the sponge, so I said the bakers should add 450 g of flour to make up the full 500 g of flour.

Nell then pointed out that my original recipe said 300 g of sponge, so I had to quickly try to work out how to correct the mess I had got everybody into. Mental arithmetic under pressure is a lot harder than in normal circumstances, and I rather went to pieces at this stage.

We increased the sponge in our bowls from 100 g to the correct 300 g (which I was still assuming was 150 g of flour and 150 g of water); reduced the flour from 450 g to 350 g to make (as I thought) a total of 500 g of flour; and added 200 g of water to make (as I thought) a total of 350 g of water.

But that first mistake meant that although we were aiming at 70% hydration (700 g water per 1000 g flour) we were actually getting something a lot wetter.

Assuming my sponge was at exactly the right level of gooiness for a quarter sponge, then the 300 g of sponge we put in each loaf would actually contain 174 g water (58% of 300 g) and 126 g of flour.

And the dough we ended up with would be 174 + 200 = 374 g of water and 126 + 350 = 476 g of flour. That means our actual hydration level would be 374 / 476 = 78% hydration. The difference between 70% and 78% hydration is very significant!

And of course as I made the sponge by eye, it could have been even wetter than that. So I have really learned an important lesson here: you need to measure the contents of your sponge as meticulously as you measure the ingredients of your dough.

So long as you measure the sponge ingredients carefully, and assuming you are always aiming at 70% hydration in the finished dough, the 100 g of sponge you keep back for your next bake will be pretty accurately 140% hydration. So next time you bake, you can produce a sponge at 140% hydration simply by adding extra flour and water in the proportion 5 parts flour to 7 parts water.

To keep your sponge production simple, don't feed your culture between bakes. When you want to bake just make a sponge by putting the whole 100 g of culture into the sponge, and then weigh out 100 g of the sponge to keep in the fridge as your culture for next time.

This all sounds like fanaticism, but I really don't think this is too much trouble to take to make sure you get the result you want.

I am now coming to the conclusion that I have probably been making my dough quite a lot softer than I intended, because I have been significantly underestimating my hydration level. However, this is all good practice, because I have got reasonably well used to handling very soft dough, so if I find that my dough in future is a little firmer, I should be able to handle it a little easier.

The normal Friday baking session


The day dawned bright and fresh, and I was in the shepherd's hut early to check the dough.

At 9 o'clock the others joined me, and three home sponging bakers had brought their own dough from home. So we had a full house, and were on the way to a successful bake, even if there was a question mark over the hydration question.

Shaping the dough


Our first job on Friday was to shape our dough and load it into baskets to prove. As we had some first timers, I did a quick demo of my legendary shaping technique. I turned my wobbly dough out onto a very well floured worktop, pointing out that shaping introduces a little structure into dough which has had a long time to develop, but has developed in an untidy way. We could see lots of gluten strands, but everything was very soft - no tension at all.


My first step was to roll the dough up into a swiss roll shape. I stretched the dough gently as I turned it, so that I introduced a little tension round the outside of the swiss roll shape, in the direction I was rolling the dough. Then I let it rest for a while, with the trailing edge of the dough running along the bottom of the swiss roll. In theory, letting it rest allows the "seam" to seal up.

The dough was still quite soft after this first roll, and very wide - too wide for the basket, for sure.


The second step was to turn the dough through 90 degrees and repeat the stretch and roll, this time rolling the dough up along the considerable length of the swiss roll shape. After this was complete, the dough was quite noticeably firmer. I had introduced another set of tension at 90 degrees to the first lot, so the gluten was being made to sit up and take notice. You are aiming at a network of gluten strands, after all, strong enough to contain the gas that the dough is still producing. I let the dough stand on the seam again, to let it seal up as best it could.


Finally I turned the dough through ninety degrees again, and stretched and rolled it for a third time. After this it was really nice and elastic. Before leaving it to seal, I tucked the ends of the swiss roll underneath so that I would have a nice tidy end to my loaf, instead of it looking like the swiss roll it really was.

When I thought it had had long enough to seal the seam up, I confidently turned the dough upside down into my proving basket, only to find that the seams had not really sealed up at all. Never do demonstrations - they always go wrong! (The two pictures in this section are not pictures of my bread.)

Over to you


Once I had my bread safely in the basket, it was time for the group to have a go at handling some really soft dough. For some bakers, this was a first, as  this was their first sourdough. And it can be quite daunting when the dough is so soft, because it quickly starts to slide around in your hands. If you lose it, and rush to correct the situation, you are unlikely to remember afterwards what you actually did, so you don't learn anything from the experience.

Stay calm is the best advice - stay calm and make some tea.

People had varying levels of success with the shaping, I think it's fair to say. It's not something you can get right first time, and it really feels different with sourdough.

Eventually we were all safely in the baskets -


After a good couple of hours resting in the baskets, the next hurdle was to turn the bread out onto the worktop. Because we had lots of bread to go in the oven, we needed to get two loaves on each stone. 

I suggested we turned the bread out onto parchment on the worktop, and then shoot the whole thing off a tray into the oven, parchment and all. This got the bread in the oven double quick, so the doors could be closed quickly, And it also meant that the difficult job of fitting two loaves side by side could be done on the worktop, rather than on the way onto the stone in the oven.

Again, fortunes were a little mixed at this stage, and some loaves opened up rather more than would have been ideal. And there was some sticking to the baskets, particularly our friend Mr Beetroot. Do you fancy your chances of getting that pink blob of dough out in one piece?


Er.... not really.


As it turned out, it was happy enough once it made it to the oven. And all the straggly bits just take on a life of their own in the finished bread, giving character to the shape - no problem!


But with such wet dough and all that beetroot colour, cleaning the basket out was a bit of a mare, it must be said.

Final results for the sourdough stakes


Given our over all lack of experience with sourdough, I think we produced very commendable results. And if everybody's tasted as good as mine, I think there will be some happy bakers this week, as well as justifiably proud ones.


There are some unorthodox shapes, it's true, but that's just rustic, after all!


It's hard to see how this next shape was raised in an oblong basket, but it was!


You don't see one of these every day. This is due to the way we got two on a shelf, of course.The bread itself looks really good.


A calculator is not just for Christmas


The main lesson I learned this week was that if I can get in such a tizzy with the ingredients, I really need to start working with a calculator when I'm making bread. So that's my Christmas stocking sorted out - two walnuts, a satsuma and a calculator please, Santa.

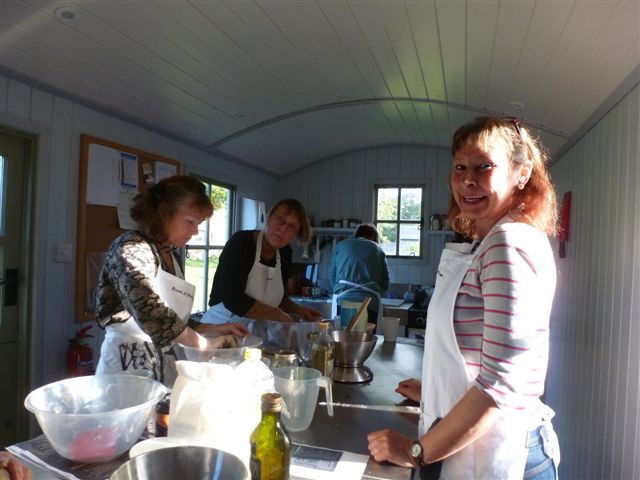
Hopefully the lesson the group learned was that sourdough may be a bit fiddly, but it tastes great and it really is within everyone's grasp if they want to do it, and it's fun. Here's the evidence that we had fun -


Whatever the weather when we start, it's not long before the smiles break out.

Sodabread and similar


Everybody went pretty much to town with the sodabread recipes this week, which is great. Not only do we get to taste lots of interesting variations, but we get to see what works that we might not have tried ourselves.

I sat out and didn't do a sodabread this time, because I have had trouble getting the soda element right in the past. But our intrepid bakers seemed to have no trouble at all with dispersing the soda properly through the dough.


This was the beginnings of a tremendous apple and cider sodabread. The smell when it came out of the oven was scrumptious. And how bold to add that much wet flavouring to a sodabread, but it worked out just fine.


And what about this? This is a fantastic six-strand plait, and didn't it turn out well, egg glaze and all!


Here are some photos from the Thursday group's last couple of bakes. Hopefully they tell their own stories.